

Rich
-
Content Count
1,063 -
Joined
-
Last visited
-
Days Won
1 -
Donations
10.00 -1
Content Type
Profiles
Forums
Gallery
Calendar
Posts posted by Rich
-
-
Hi Peter
Welcome to The DIY Forum... Hopefully you can get the help you need.
What projects are you working on currently?
-
Thanks for the pictures DIYNovice, the problem makes more sense now seeing it close up.. :-)
What wood are those doors made of? Hardwood by any chance?
That grainy lumpy affect is often caused by painting onto sticky surfaces, where the first coat isn't dry yet, but isn't wet enough to smooth itself out if you go over it again.
What I would do in this situation is remove the door, take it outside and go at it with a small palm sander and some mildly abrasive paper, like a 120 grit, then a 600 grit to smooth it off, until its 100% smooth and flat. Then wash it off with sugar soap, then take it somewhere as dust-free as possible and paint 1 coat on and leave for 24hrs.
If it comes out great, then apply a second coat straight on top only if needed. So if there are no uneven or see-through parts, then 1 coat is fine. If it does need a second coat, be sure to wipe the surface down of any dust that settles, as it gets into the paint, depends where you live too, because busy roads create a lot of dust and dirt in the air. (This is just being pedantic I know, but lots of small gains add up to a nicer finish)
The key to a good finish is in the preparation :-)
-
Incompetent & Highly unprofessional.
So we hired him to replace our entire garden fence as it was wrecked.. Here is how it went..
DAY 1. (Of what he said was going to take 2 days)
Gets here just before 9am and he is asking me "Is your wife home, we could fucking murder a cuppa tea", this is before he has even done anything. The repeated requests for tea really pissed us off. Was amazed he even managed to unload the van on day 1 for the constant very lengthy tea breaks.He gets approx half way down the garden, and the first 8 panels are pissed, not straight and the concrete posts are NOT cemented in, they are just wobbling, but the holes have been filled in with soil and lumps of broken concrete.
We made it crystal clear to him that he is welcome to take down/remove anything that is in his way, as there were 2 bushes extremely close to the fence. This was half-arsedly done by hacking down the bushes, then fencing around where the bush was,
He left by 2pm.
DAY 2.
Again arrived just before 9, I told him NOT to bother my wife for tea as she was incredibly busy video conferencing with 20 people at once, most of the day, which, but he ignored this and made sure he got his tea breaks. (I had to go to work for the rest of the day)So I get home to find he had buggered off shortly after 1pm, had still not cemented the concrete posts in, the fence now had 12 panels in, and was even more pissed.
It seems a string line is not within his skill-set.
So I sent him a text telling him to bring postcrete and use it!
He phones me and when I asked why he didn't install the fence even remotely STRAIGHT, his response was "Just following the old fence". Seriously?
I then asked him why he had used NO cement on all but 2 posts, he claimed he did, yet I was staring at the hole in the ground, which I was able to dig back out with my foot!
I actually dug 2 posts back up with his shovel, looking for the cement, never did find any. Told him I was seriously not happy and I just wanted him to do the job properly, "I should have to tell you how to use concrete and water!"
DAY 3,
I have now had to cancel all lessons for the day to supervise this incompetent dinosaur, as he clearly cannot be trusted.First thing he says to me in the morning is "Make us a fucking cuppa tea mate". I literally had to tell him "Would you dare to repeat that?"
Oddly enough, he did, so I had to tell him to his face "How about you get this f***ing job finished and watch your mouth"
Yet another half day's sloppy work, bad manners and wandering about with his trousers undone. I actually stand next to him and his sidekick watching them, and 4 times had to ask them to use the Postcrete correctly and stop mixing it with soil.
This was met with "We've always done this, we been doing this for years"
His manners and language are pathetic! He seems to think my garden is his toilet, yet walks around with his trousers undone, constantly fiddling with himself, with EVERY second word being "F***".
The moaning and complaining from him is just depressing, nobody wants to hear him constantly complaining, swearing and bitching about everything.
Finally end of day 3, I have now lost a days wages in having to supervise this Muppet, and when its time to pay, he wants full price?
I had to make it crystal clear to him and TELL him that I am deducting my losses for his incompetence. Not once did he offer an apology, no sign of any embarrassment from him for doing sch a god awful job, or for having to have me telling him to do it right repeatedly.
He really was convinced there was nothing wrong and he had done a cracking job!
He seems extremely stuck in the 1970's, both in attitude, work ethics, morals and tardiness. Would never employ him again, nor recommend. Even my neighbour wanted some work done and changed his mind after chatting to the guy.
He really has no clue about how to treat customers or do an actual full days work and zero self discipline to do anything properly.
-
Hiya Will
That really is odd. Do you have any bigger photos, possibly HD resolution and close ups?
Have you got a PH meter at all and a moisture detector?
It is possible, whilst a longshot, that the wood may be dry to the touch, yet moist from behind.
Are there any sources of water inside the wall or under that floor?
Whats the black stuff on the floor, all around that corner piece? It looks like the floor has gone black too?
Also, how far apart are these 2 instances in the property? Are these pictures either side of the same wall or at opposite ends of the building?
-
Hi Gabrielle
Is the existing carpet all 1 piece, in which I mean, will you have to cut the carpet to remove it?
I assume the answer will be yes, as most stair carpet is done in sections of 3 to 4 steps at a time.
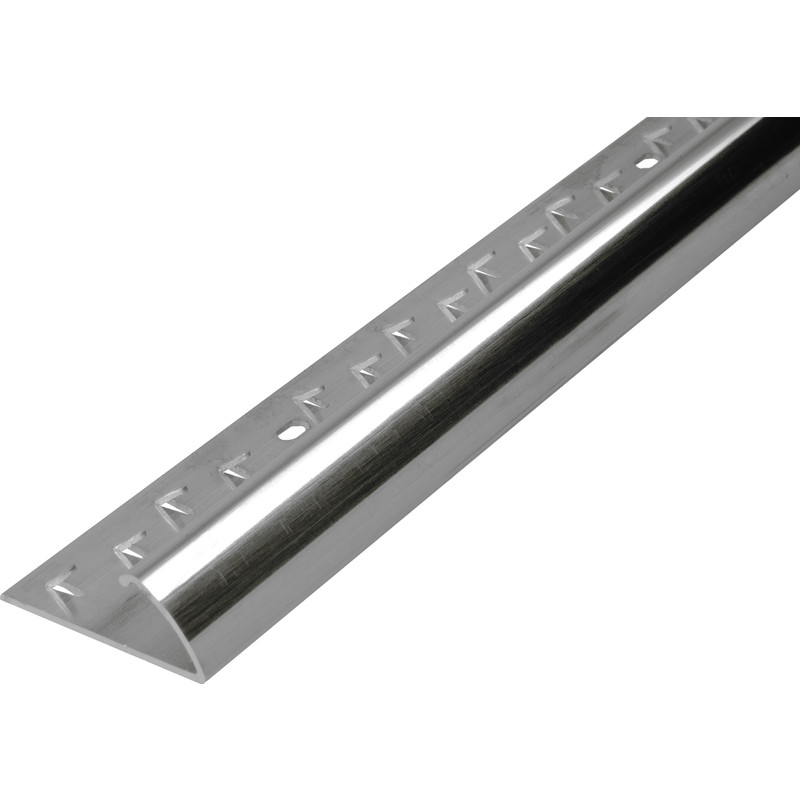
The piece of carpet on the riser (The horizontal piece that starts step 2 should be tacked in place already, however, something like this could be installed to give it a finish and stop it from fraying:
https://www.toolstation.com/shop/Ironmongery/d170/Metal+Edging/sd3009/Carpet+Edging/p15813

-
If its a thin layer of paint, then yes, no reason why some paint stripper cant be used, then the paint scrapped off. If it was gloss paint, then paint stripper is wise, but if it wasn't gloss, then a good sand down to smooth and key the surface is typically fine.
I note it does say on the dulux website too that only 1 or 2 coats of this stuff liberally is needed, with at least 6hrs between coats.
How long did you wait for it to dry when you did the first coat?
Did you paint the doors in place or take them off and lay flat?
Got a picture of the doors and the lumps?
As you said the original paint was fairly thin, then the lumps in the finish can also be caused by the paint not stirred thoroughly, thus lumpy, or drips where its running down the surface, or re-applied too soon before its dry.
Are the lumps noticeable or only up close when you feel it with your hands?
-
Hiya Novice.
Prior to starting this, what surface was already on the cupboard doors? Was it laminate or paint?
How much paint was on the doors already? Was it thick with lots of layers or some heavy gloss paints?
Lumpy/bumpy can also be caused by too much paint..
Secondly, what paint are you using? Do you have a name / Brand / Link / Picture of it?
-
Hi Mate
To be fair, this is the sort of thing that is worth having an expert come in to take a look at, as you are talking structural integrity here.
For the cost of an engineers visit, you can save yourself a ton of money and hassle and any costly mistakes, especially as your pictures dont show anything other than the part where the lintel meets the wall, so its impossible for anybody to even comment, let alone offer any advice other than to seek a professional who can evaluate the entire floor/wall and surroundings.
-
Have to agree, those chairs are mega comfy. I'd have been inclined to break out the paint stripper gel and brush it on, doing 1 segment at a time. If going nuts is required, cover the whole thing, then steam clean it off and allow the wood to dry out overnight, as steam cleaning it wont penetrate right into the wood so much.
-
On 14/03/2014 at 6:22 PM, giraffe76 said:
Hi all,
Can you tell me the best way to store clothes in a garage thats vunerable to mould
Kind regards Mark
The simple answer is, "Don't". Sounds like your garage needs better insulating.
-
Scrape it all off, then sand the edges to smooth the bumps with some coarse sandpaper (Wear a mask when doing this) and then when no bumps or lumps, paint with Kitchen and bathroom paint only.
-
Hi Mike
Welcome aboard, ask anything you like. Look forward to hearing it.
Rich
-
Hiya Geek
Welcome to the D.I.Y forum :-)
In answer to your question, have you done any DIY at all yet?
What do you think might be the most common jobs around a home that you might find yourself doing?
Typically, you are going to find that a hammer, a variety of screwdrivers, some pliers are the 3 most common tools in most homes, then if you want to get a little more "into it" then sure, a drill and maybe electric screwdriver if you want to start putting things on walls, but then you need to delve into all the different types of fixings and what you are fixing things to, so obviously putting things onto walls can be the trickiest of DIY tasks, unless you feel like tackling plumbing or electrics..
-
Hi Bobloes
There wasn't a flooring section yet as nobody had asked flooring questions.. I've now added one, so you can put the first flooring topic in :-)
Interesting username (Bobloes), how did that come about?
-
Hi Bobsy
Sadly this is one of those things where explaining it here would likely mean its time to call in a professional..
Whilst you "could" do it yourself, because its on the outside walls of your house, you would want to be checking if existing plaster is solid or is it coming away from the walls anywhere at all, and adding more render to the outside walls instead of knocking off and starting fresh comes with its own hassles too.
You would need to be able to plaster/render to do this, and dependant on where you live, moisture in the air etc, would also affect how you mixed up the render.
Best starting point would be to get at least 3 quotes from professionals, 5 is better, then weight that up by deducting the cost of materials and whatever you are left with is your "Is it worth this much" factor..
Do you have a section of wall anywhere that you could practice rendering, like on the inside of a garden wall, just so it doesn't look a mess on the outside and for the neighbours whilst you practice rendering?
You never know, you might find you are really good at it and its easier than you though or you might find its actually proper hard work, messy and getting a mix just right takes a lot of practice.. Depends on your own needs, and if you have the time for it :-)
As with all things though, grab some practice if possible, start with tutorial vids on YouTube "Brick Rendering tutorials"
Here is an example of everything you need and how to do it:
-
Hiya Bobsy
Good to hear from ya, and please do feel free to share some "before" pictures and then some "after" or "I give up" photos depending how well it goes :-)
-
Hi Vino
Dont you have shut off taps or valves to your mixer tap?
It should be fairly common to install a shut-off valve to a mixer tap from both the Cold and the Hot taps, so you can simply switch those valves off and work on the tap as needed..
-
Hiya Westforester
Glad to have you here and hopefully you can find the help you need :-)
-
Are you trying to upload them directly from your camera or phone?
Typically they could potentially be many many MB's in size, so will need resizing...
This is very common for digital pics being uploaded to websites.. Our limit here is 500kb per picture
-
Hi kris1985,
Welcome to The DIY Forum, and thanks for joining us here.
Please feel free to browse around and get to know others. If you have any questions please don't hesitate to ask.
I certainly look forward to hearing from you sometime soon, and hearing all about your DIY experiences...
Be sure to check out the DIY Forum rules, just to ensure were all on the same page.
If you have any problems using your new community or comments, suggestions or feedback then I sure would love to hear them.
There is also a great FAQ section on how to use this website and its features if you need it.
Why not tell us a little about yourself, let others get to know you, and what you get up to?
Please do NOT post links to your business, adverts or any other kind of spam. New members posting links to their business/shop or who seem to be here ONLY to plug their business WILL be deleted and flagged as a spammer with ALL Invision Powerboard Forums!
Welcome again
Richard... Official DIY Forum Slave
-
Hi thorntonsr12,
Welcome to The DIY Forum, and thanks for joining us here.
Please feel free to browse around and get to know others. If you have any questions please don't hesitate to ask.
I certainly look forward to hearing from you sometime soon, and hearing all about your DIY experiences...
Be sure to check out the DIY Forum rules, just to ensure were all on the same page.
If you have any problems using your new community or comments, suggestions or feedback then I sure would love to hear them.
There is also a great FAQ section on how to use this website and its features if you need it.
Why not tell us a little about yourself, let others get to know you, and what you get up to?
Please do NOT post links to your business, adverts or any other kind of spam. New members posting links to their business/shop or who seem to be here ONLY to plug their business WILL be deleted and flagged as a spammer with ALL Invision Powerboard Forums!
Welcome again
Richard... Official DIY Forum Slave
-
Hi Hemdale,
Welcome to The DIY Forum, and thanks for joining us here.
Please feel free to browse around and get to know others. If you have any questions please don't hesitate to ask.
I certainly look forward to hearing from you sometime soon, and hearing all about your DIY experiences...
Be sure to check out the DIY Forum rules, just to ensure were all on the same page.
If you have any problems using your new community or comments, suggestions or feedback then I sure would love to hear them.
There is also a great FAQ section on how to use this website and its features if you need it.
Why not tell us a little about yourself, let others get to know you, and what you get up to?
Please do NOT post links to your business, adverts or any other kind of spam. New members posting links to their business/shop or who seem to be here ONLY to plug their business WILL be deleted and flagged as a spammer with ALL Invision Powerboard Forums!
Welcome again
Richard... Official DIY Forum Slave
-
Hi Brussels,
Welcome to The DIY Forum, and thanks for joining us here.
Please feel free to browse around and get to know others. If you have any questions please don't hesitate to ask.
I certainly look forward to hearing from you sometime soon, and hearing all about your DIY experiences...
Be sure to check out the DIY Forum rules, just to ensure were all on the same page.
If you have any problems using your new community or comments, suggestions or feedback then I sure would love to hear them.
There is also a great FAQ section on how to use this website and its features if you need it.
Why not tell us a little about yourself, let others get to know you, and what you get up to?
Please do NOT post links to your business, adverts or any other kind of spam. New members posting links to their business/shop or who seem to be here ONLY to plug their business WILL be deleted and flagged as a spammer with ALL Invision Powerboard Forums!
Welcome again
Richard... Official DIY Forum Slave
-
Hi SHampson,
Welcome to The DIY Forum, and thanks for joining us here.
Please feel free to browse around and get to know others. If you have any questions please don't hesitate to ask.
I certainly look forward to hearing from you sometime soon, and hearing all about your DIY experiences...
Be sure to check out the DIY Forum rules, just to ensure were all on the same page.
If you have any problems using your new community or comments, suggestions or feedback then I sure would love to hear them.
There is also a great FAQ section on how to use this website and its features if you need it.
Why not tell us a little about yourself, let others get to know you, and what you get up to?
Please do NOT post links to your business, adverts or any other kind of spam. New members posting links to their business/shop or who seem to be here ONLY to plug their business WILL be deleted and flagged as a spammer with ALL Invision Powerboard Forums!
Welcome again
Richard... Official DIY Forum Slave
Want your website link here? Contact me for pricing
New Donation Anonymous
in Welcomes and Introductions
Posted
Hi Anonymous,
Thank you for your donation of $10.00. We look forward to improving the forums with your donation.
Thanks The DIY Forum